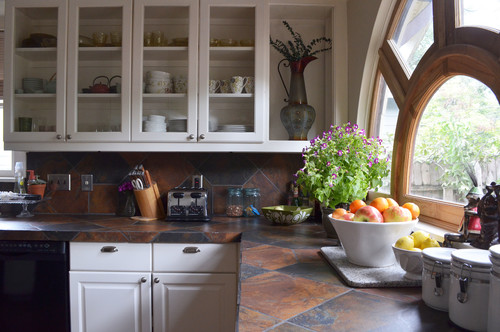
Ceramic tile is used in bathrooms, kitchens, and hallways because of its water resistance, longevity, and simplicity. Ceramic floor tile installation is a do-it-yourself activity that homeowners can handle cheaply and easily.
Floor tile installation requires preparation. With a firm foundation, a functional scheme, and all your equipment and supplies, installing floor tile with mortar and grout is relatively straightforward.

Assess
Inspect the surface you’ll tile. The substrate, or what tile is laid on, is equally as significant as the tile itself. Flexing floors may break tiles and grout. Water-resistant backer board, not drywall, should be utilized beneath wet tile (shower walls and bathroom floors, for example). Backer board, plywood, or concrete must be sound, clean, and sturdy. The professionals believe surfaces must be flat and true to plane—no bumps. Loose plaster, flaking paint, peeling tiles, or insecure sheet flooring must be removed.
Measure
Find the middle of your ceramic tile surface to make it seem symmetrical (even if it’s not). Then measure in from the sides. Wide tiles at one edge and thin tiles at the other will make the project seem out of balance.
Older homes may have uneven floors, making the work more difficult. Use the most visible wall as a baseline, so tile lines are parallel to it; your project will seem more even. Snap perpendicular chalk lines from the center and baseline. These split the room into quadrants. Work outward from each section’s center.

Lay out the tile
After finding the center point and squaring the area for floor installations (or the top line level for walls), lay down the tiles to see how they will look. Dry each quadrant before mixing adhesive or mortar.
Tiles should be evenly spaced. Tiles not on mesh sheets need spacers. Larger tiles need more space between them. Some DIYers overlap tiles to eliminate grout lines. Without adequate surface area, grout might disintegrate early, causing leaks and water damage. It’s also vital to let the adhesive set properly. Work across one quadrant, then up or down, one row or course at a time while tiling. Before gluing, measure again with a tape and dry-lay the tile.
Cutting the tile
First, measure the tile you want to cut and transfer the proportions using a felt-tip marker. Align the tile cutter’s centerline with the tile’s axis. To keep it square, the top of the tile should be flush with the fence at the top of the cutter. Push the cutter’s lever firmly and evenly over the tile’s surface. Cut once. Snap the tile.
Snap cutters snap tile differently. Some levers have the cutting wheel at the heel and others at the toe. Use the cutter’s surface to push the score line. The tile will break with a bead in the cutter’s base and pressure.

Adhering the tiles
Use water-resistant glue in a damp environment—kitchen, bathroom, entrance, etc. Use a premixed adhesive or thin-set mortar. (Thick-bed mortars need experience and the ability to smooth, and the extra mortar isn’t required for a waterproof finish.)
Check the adhesive’s bottle to see how fast it dries. Distribute glue with a square-notched trowel, then twist each tile to spread. Start at the middle and proceed outward. Before grouting, wait according to the manufacturer’s recommendations.
Grouting the tiles
Grout is a powder that’s blended with water or an additive. Consult the box or tile retailer for directions. Wear gloves and apply grout evenly, pressing it into joints with a rough object. Dyeing or pigmenting the grout might improve your color scheme. Even after being sealed (recommended for flooring), white grout may be hard to clean.
Cleaning and sealing
Remove tile residue before it dries. This stage will take at least an hour. It’s crucial for porous or variegated tiles. Dry grout in indentations is challenging to remove. Apply grout sealer per the manufacturer’s instructions, and you’re done!
Do you want to know who to pour a concrete slab? Learn how to do that by reading about how to pour concrete slabs for beginners.


